
Step 2: Wash and Dry Thoroughly
Scrub each potato under cold running water. Use a vegetable brush to remove dirt from the skin. The skin is about to become delicious you want it clean.Fruits & Vegetables
Crucial step: Dry the potatoes completely with a clean kitchen towel or paper towels. Any moisture left on the skin will turn to steam and prevent crisping.
Step 3: Pierce the Skin (Don’t Skip This!)
Use a fork to pierce each potato 6-8 times, all over. Poke deep enough to penetrate the skin. This allows steam to escape during baking.Ranges, Cooktops & Ovens
Why this matters: Without vent holes, steam builds up inside. The potato can explode in your oven. It’s rare, but it happens. Also, piercing allows moisture to escape, which helps the interior become fluffy instead of dense.
Step 4: Season the Skin (This Is the Secret)
Place the dried, pierced potatoes in a large bowl. Drizzle with 1 tablespoon of neutral oil per potato (avocado oil, vegetable oil, or melted butter). Toss to coat evenly.Fruits & Vegetables
Sprinkle generously with coarse kosher salt (not fine table salt) and freshly ground black pepper.
Optional seasonings: garlic powder, onion powder, paprika, or dried rosemary.
Why oil? Oil conducts heat, crisps the skin, and helps the seasoning stick. Skip the oil and you’ll get dry, leathery skin.Ranges, Cooktops & Ovens
Why coarse salt? Fine salt dissolves and penetrates. Coarse salt sits on the surface, creating tiny crunchy crystals. The contrast between crispy salted skin and fluffy interior is what makes a perfect baked potato.
Step 5: Bake Directly on the Oven Rack (No Foil!)
Place the seasoned potatoes directly on the middle oven rack. Put a baking sheet on the rack below to catch any drips (sometimes oil or moisture escapes).
Do not wrap in foil. I’ll say it again: do not wrap in foil. Foil traps steam. Steam makes the skin soft and chewy. We want crispy.
Step 6: Bake for 60-75 Minutes
Bake at 400°F for 60 minutes for medium potatoes (about 8-10 oz each). For larger potatoes (12-14 oz), bake for 75 minutes.
Do not open the oven door during the first 45 minutes. Every time you open the door, heat escapes and temperature drops. Be patient.
Step 7: Check for Doneness
At 60 minutes, remove one potato (carefully it’s hot). Test by:Dairy & Eggs
Squeeze test (use an oven mitt): Give the potato a gentle squeeze. It should give easily and feel soft all over.
Fork test: Insert a fork or skewer into the center. It should slide in with no resistance, like room-temperature butter.
Internal temperature: Should be 205-210°F (use an instant-read thermometer).
If the potato is still firm, return to the oven and check every 10 minutes.
Step 8: Remove and Slit Immediately
Remove the potatoes from the oven. Using a sharp knife, immediately cut a deep “X” or a long slit down the center of each potato.
Why immediately? As the potato cools, the interior continues to cook and then sets. Cutting it open immediately releases steam and stops the cooking process, ensuring a fluffy interior.
Step 9: Fluff the Interior
Hold the potato (with an oven mitt) at both ends. Gently squeeze and push inward. The fluffy interior will push up through the slit, like a blooming flower.Herbs & Spices
Then take a fork and gently “fluff” the inside by scraping back and forth. This creates pockets for butter and toppings to melt into.
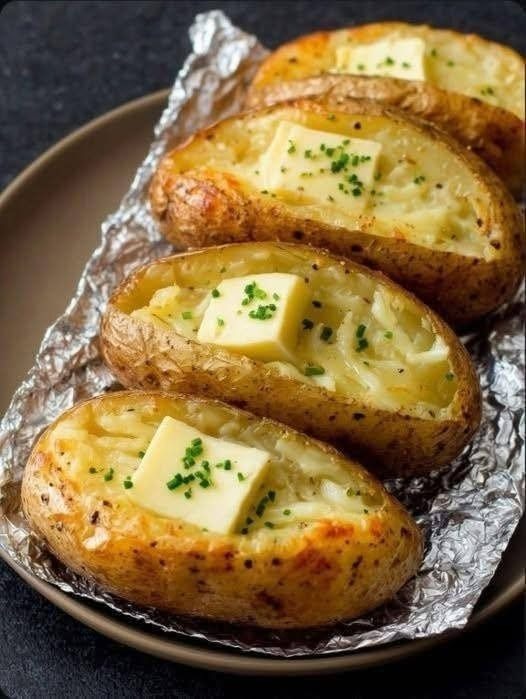
Step 10: Add Toppings and Serve Immediately
Add a generous pat of butter (it will melt into the fluffy crevices). Sprinkle with additional salt if needed. Serve with your favorite toppings (see below).
The Science Behind the Perfect Baked Potato (Quick Explanation)
If you’re curious why this method works, here’s the simple science.
Starch gelatinization: Potatoes contain starch granules. When heated with moisture (the water inside the potato), the starch granules absorb water, swell, and eventually burst, creating that fluffy texture. This happens around 140-160°F.
Pectin breakdown: Pectin is the glue that holds potato cells together. At higher temperatures (180-200°F), pectin breaks down, allowing the cells to separate easily. That’s why a properly baked potato is tender, not gluey.Fruits & Vegetables
Steam escape: Cutting the potato immediately after baking releases steam. If you let the potato cool with the steam trapped inside, the moisture reabsorbs into the starch, making it dense and pasty.
Crispy skin: Oil + high heat + dry surface = Maillard reaction. The amino acids and sugars on the potato skin react to form a crispy, brown, flavorful crust. Foil prevents this by keeping the skin moist.
Oven Variations (Convection, Toaster, Air Fryer)
Convection oven: Reduce temperature to 375°F and reduce bake time by 10-15 minutes. Convection fans circulate hot air, which speeds up cooking and crisps skin even more.
Toaster oven: Follow the same method. Bake at 400°F. Check at 45 minutes (toaster ovens cook faster due to smaller cavity). Rotate the potato halfway through.
Air fryer: This is actually my favorite method for single potatoes. Preheat air fryer to 400°F. Season the potato as described. Place in the air fryer basket. Cook for 35-40 minutes, flipping halfway through. The skin gets even crispier than the oven method.
Microwave “baked” potato (emergency only): Pierce potato. Microwave for 5-7 minutes per potato, flipping halfway through. Then transfer to a 400°F oven for 10-15 minutes to crisp the skin. The microwave speeds things up; the oven provides the crisp.Snack Foods
Toppings Bar Ideas (For the Ultimate Loaded Potato)
A perfect baked potato is a blank canvas. Here’s how to build a masterpiece.
Classic:
Butter
Sour cream
Chives or green onions
Salt and pepper
Loaded Baked Potato (Steakhouse Style):
Butter
Sour creamRanges, Cooktops & Ovens
Shredded cheddar cheese
Crumbled bacon
Chives
Chili Cheese Potato:
Butter
Beef or turkey chili
Shredded cheddar cheese
Diced onions
Jalapeños (optional)Dairy & Eggs
Broccoli Cheddar Potato:
Butter
Steamed broccoli florets
Shredded cheddar cheese
Sour cream
Tex-Mex Potato:
Butter
Black beans
Corn
Shredded pepper jack cheeseHerbs & Spices
Pico de gallo
Avocado or guacamole
Cilantro lime crema
Pulled Pork Potato:
Butter
Pulled pork (barbecue style)
Coleslaw
Pickled red onions
Breakfast Potato:
Butter
Fried or poached eggFruits & Vegetables
Crumbled bacon or sausage
Hollandaise sauce (fancy) or hot sauce (easy)
Vegan Potato:
Olive oil or vegan butter
Cashew sour cream
Roasted vegetables
Nutritional yeast (for cheesy flavor)
Fresh herbs
Frequently Asked Questions
Can I bake potatoes wrapped in foil if I want soft skin?
Yes, but you asked for crispy skin. If you prefer soft skin (some people do), wrap in foil. The interior will still be fluffy, but the skin will be tender, not crispy. Reduce oven temperature to 375°F if using foil.Microwaves
Why do restaurant baked potatoes taste so much better?
Three reasons: (1) They use Russets. (2) They rub the skin with oil and salt. (3) They hold them in a warmer after baking, which continues to dry out the skin, making it extra crisp. You can replicate this by keeping baked potatoes in a 200°F oven for up to an hour before serving.
Can I bake multiple potatoes at once?
Absolutely. Just leave space between them for air circulation. Don’t stack them. If your oven is small, bake in batches.
How do I reheat a baked potato without ruining it?
Oven method: Bake at 350°F for 15-20 minutes. Microwave method (faster but skin softens): Microwave for 2-3 minutes, then finish in a dry skillet to crisp the skin. Air fryer method: 350°F for 5-7 minutes.
Can I bake sweet potatoes using this method?
Yes, with adjustments. Sweet potatoes have more moisture and sugar. Bake at 400°F for 45-60 minutes (they cook faster). Test doneness with a fork. The skin of sweet potatoes doesn’t get as crispy as Russets, but the oil-salt method helps.
My potato is still raw in the middle. What went wrong?
Either your oven temperature is inaccurate (buy an oven thermometer), your potatoes were too large (cut them in half next time), or you didn’t bake them long enough. Russets vary in size always test doneness with a fork, not the clock.Cheese
Why does my potato have black spots inside?
That’s internal bruising or a condition called “internal black spot.” It’s harmless. Cut out the spots. It doesn’t affect flavor or safety.
Can I bake potatoes ahead for a party?
Yes. Bake them fully. Let them cool completely. Refrigerate for up to 2 days. To reheat, bake at 350°F for 20-25 minutes. The skin won’t be as crispy as fresh, but still good. For best results, reheat in an air fryer.
A Warm, Encouraging Conclusion
Here’s what I love most about this method: it turns a humble potato into something you’re genuinely excited to eat. Not a sad, forgotten side dish. Not an afterthought. The main event.
That night my friend threw away my aluminum foil, she taught me more than how to bake a potato. She taught me that sometimes the best techniques are the simplest. No gadgets. No complicated steps. Just good ingredients, proper heat, and patience.
I’ve made hundreds of potatoes this way since then. For weeknight dinners, holiday feasts, and Super Bowl parties. I’ve never gone back to foil. I’ve never had a soggy skin since. And neither will you.Dairy & Eggs
So next time you’re staring at a bag of Russets, don’t overthink it. Wash them. Dry them. Oil them. Salt them. Stick them directly on the oven rack. Wait. Cut them open. Fluff. Top. Eat.
And when you take that first bite the crackle of the skin, the cloud of the interior, the butter melting into every crevice you’ll understand why the perfect baked potato is worth doing right.
Now I’d love to hear from you. Did you try this method? Did your potato finally get crispy? Have you been wrapping in foil your whole life and now feel betrayed? (I did too.) Drop a comment below your wins and your potato confessions make this community so much better.
And if this guide finally gave you the perfect baked potato, please share it with a friend who’s still suffering through sad, soggy skins. A text, a pin, a shared link. Good potato knowledge is meant to spread.
Now go preheat that oven. Your perfect potato is waiting.
ADVERTISEMENT
