
 Step-by-Step Preparation
1. Prepare the Chicken Cutlets (The Key to Even Cooking!)
-
Slice: Take each chicken breast and slice it horizontally to create two or three thinner pieces (cutlets). Aim for a thickness of about $1/2$ inch. This ensures quick and even cooking.
-
Pound (Optional but Recommended): Place the cutlets between two sheets of plastic wrap. Use a meat mallet (the flat side) or a rolling pin to gently pound them until they are uniformly thin—around $1/4$ inch thick.
-
Season: Season both sides of the cutlets generously with the salt and black pepper.
2. Set Up the Breading Station
Organize three shallow dishes in an assembly line—this is your “Dredging Station”:
-
Dish 1 (Flour): Place the $1/4$ cup of All-Purpose Flour. This helps the egg stick better.
-
Dish 2 (Egg Wash): Whisk together the eggs, milk, $1/4$ cup Parmesan, fresh parsley, and garlic powder. Mix until well combined.
-
Dish 3 (Breadcrumbs): In the final dish, mix the Panko, Italian breadcrumbs, $1/2$ cup Parmesan, Italian seasoning, onion powder, and smoked paprika. Use your fingers to thoroughly combine everything.

Page 2: Breading, Baking, and the Cheese Melt! 
 The Breading Technique (For Maximum Crispiness)
The proper breading technique is vital for a golden, crisp crust that stays on the chicken!
-
The Flour Step: Take one seasoned cutlet, and dredge it entirely in the flour (Dish 1). Shake off all the excess flour—you only want a very light coating.
-
The Egg Step: Dip the floured cutlet into the egg wash (Dish 2), ensuring it is coated on all sides. Let any excess drip off.
-
The Crumb Step: Finally, place the cutlet in the breadcrumb mixture (Dish 3). Use your hands to gently but firmly press the crumbs onto both sides of the chicken. Make sure it is completely coated. This pressure is what makes the crust stick!
-
Rest: Transfer the fully breaded cutlets to a plate and repeat the process for the remaining chicken. If time allows, refrigerate the breaded cutlets for 10-15 minutes. This resting period helps the coating adhere even better during baking!

 Baking Instructions
1. Preheat and Prep the Pan
-
Preheat your oven to $400^\circ\text{F}$ ($200^\circ\text{C}$).
-
Line a large baking sheet with parchment paper or foil for easy cleanup. If you have a wire rack, place it on the baking sheet—this elevates the chicken, allowing air to circulate and creating an even crispier bottom crust!
-
Arrange the breaded chicken cutlets on the prepared pan in a single layer, ensuring they are not touching.
-
Lightly Spray: Spritz the tops of the cutlets liberally with Olive Oil Cooking Spray. This “faux-frying” step is essential for achieving that deep golden color and satisfying crunch without deep frying!

2. The First Bake (The Golden Foundation)
-
Bake the cutlets for 12-15 minutes in the preheated oven.
-
Flip: Carefully flip each cutlet halfway through (around the 7-minute mark) to ensure even browning. The cutlets should be turning golden brown and almost cooked through.
3. The Cheesy Finish (The Melty Magic)
-
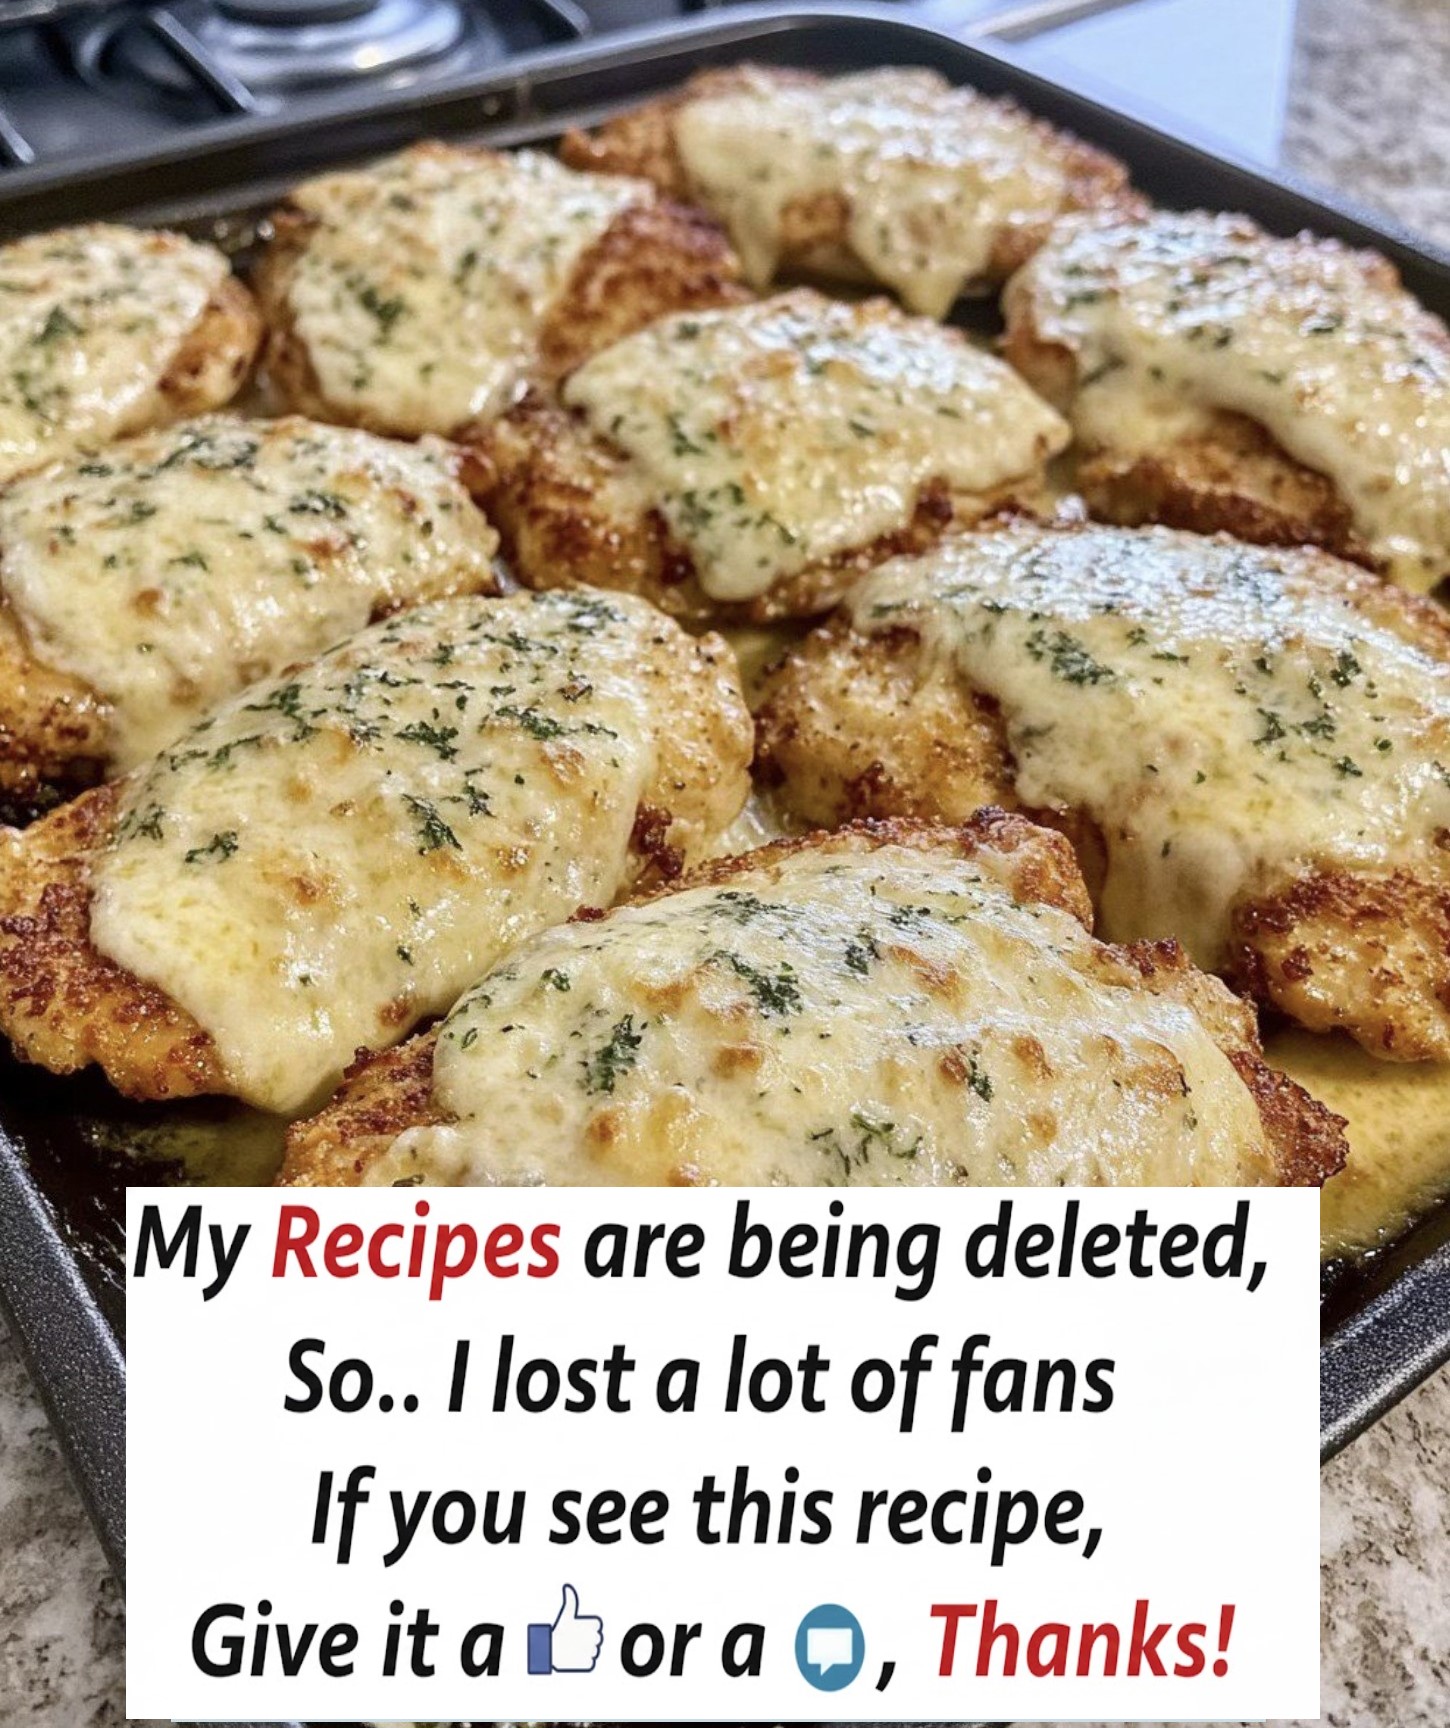
Add the Cheese: Remove the pan from the oven. Evenly distribute the shredded Mozzarella and the remaining Parmesan over the top of each golden cutlet. (As seen in the beautiful photo!)
-
Broil: Switch your oven setting to BROIL (High). Place the baking sheet back on the top rack (or a few inches from the heat source).
-
Melt: Broil for 2-3 minutes. WATCH CAREFULLY! Broilers work quickly, and you want the cheese to be perfectly melted, bubbly, and just starting to turn golden brown in spots—not burnt!
-
Check for Doneness: The internal temperature of the chicken must reach $165^\circ\text{F}$ ($74^\circ\text{C}$) when checked with a meat thermometer in the thickest part.
Page 3: Serving, Tips, and Variations 
 Serving Suggestions
The Ultimate Cheesy Garlic Parmesan Crusted Chicken Cutlets are a complete meal on their own, but they pair beautifully with a variety of sides to round out your dinner.
-
The Classic Pairing: Serve over a bed of spaghetti or linguine tossed with a light butter-garlic sauce or marinara (for a Chicken Parm vibe without the heavy sauce under the cheese).

-
Fresh Greens: A simple, crisp Arugula Salad with a lemon vinaigrette provides a refreshing contrast to the richness of the cheese.

-
Comfort Carbs: Creamy mashed potatoes or a vibrant rice pilaf are excellent choices for soaking up any delicious melted cheese drippings on the pan.

-
Green Vegetables: Steamed or roasted Asparagus, Green Beans, or Broccoli tossed with a pinch of salt and lemon zest.

-
Garnish: Just before serving, sprinkle the finished cutlets with the remaining fresh chopped parsley for a pop of color and a final fresh, herbaceous note.
Pro Tips for Success
-
Even Thickness is Everything: Taking the time to slice and pound the chicken to an even thickness ($1/4$ to $1/2$ inch) is the number one tip for preventing dry chicken. Thin cutlets cook quickly and stay juicy!

-
Chill for Stick: Don’t skip the short resting/chilling period after breading. It acts like “glue” and drastically reduces the chances of the breading falling off while baking.
-
Broiler Beware: Always keep a close eye on the cutlets during the final broil. Ovens vary, and the cheese can go from perfectly melted to charred in a matter of seconds!

-
Make it Ahead: You can bread the chicken cutlets up to 12 hours in advance. Store them, uncovered, on the prepared baking sheet in the refrigerator. Just let them sit at room temperature for 15 minutes before baking.
 Delicious Variations
Customize your dish to suit your taste!
-
Spicy Kick: Add a pinch of Red Pepper Flakes to the breadcrumb mixture or the cheese topping for a nice little heat boost.

-
Different Cheeses: Swap out some of the Mozzarella for Gruyère, White Cheddar, or Provolone for a deeper, nuttier flavor.
-
Lemon-Herb Infusion: Whisk in a tablespoon of fresh Lemon Juice and some Lemon Zest to the egg wash for a brighter, zingier profile.

-
Gluten-Free Option: Simply substitute the all-purpose flour and breadcrumbs with a Gluten-Free flour blend and Gluten-Free Panko or crushed cornflakes.
 Recipe Summary
This Cheesy Baked Chicken Cutlets recipe is a winner because it delivers on texture and flavor—the crunch of the Parmesan crust combined with the succulent, tender chicken and the rich, gooey melt of the Mozzarella topping. It’s easy enough for a beginner and satisfying enough for any food enthusiast. Enjoy the delicious aroma that fills your kitchen! 

ADVERTISEMENT
